Featuring my USDA Zone 5 Grow Guide!
There’s nothing like growing your own vegetables to truly find joy in the garden. From the first emergence of a seedling, sprouting from seeds you sowed yourself, to the harvest of delicious, nutritious produce that you grew, you’ll find rewards aplenty in vegetable gardening. Beyond your sense of accomplishment, you can provide a substantial amount of your own food, fresher and healthier than anything you can buy in the grocery store and save money on your food costs too.
Here are the six essentials you need to consider as you dive into vegetable gardening.
#1 Fundamental info
The topic of vegetable gardening is incredibly broad. By understanding some basics, you can get started, achieve some early wins, learn a ton and have some fun! I recommend the Nike mantra, “just do it”. You can read, study and research, but your garden is the very best teacher of all. Dive in!
Let’s start with the tools that will help you get the job done. Having the right equipment is important for success in your garden.
As an Amazon Associate I earn from qualifying purchases.
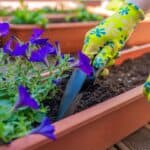
Essential tools
Nice to Haves
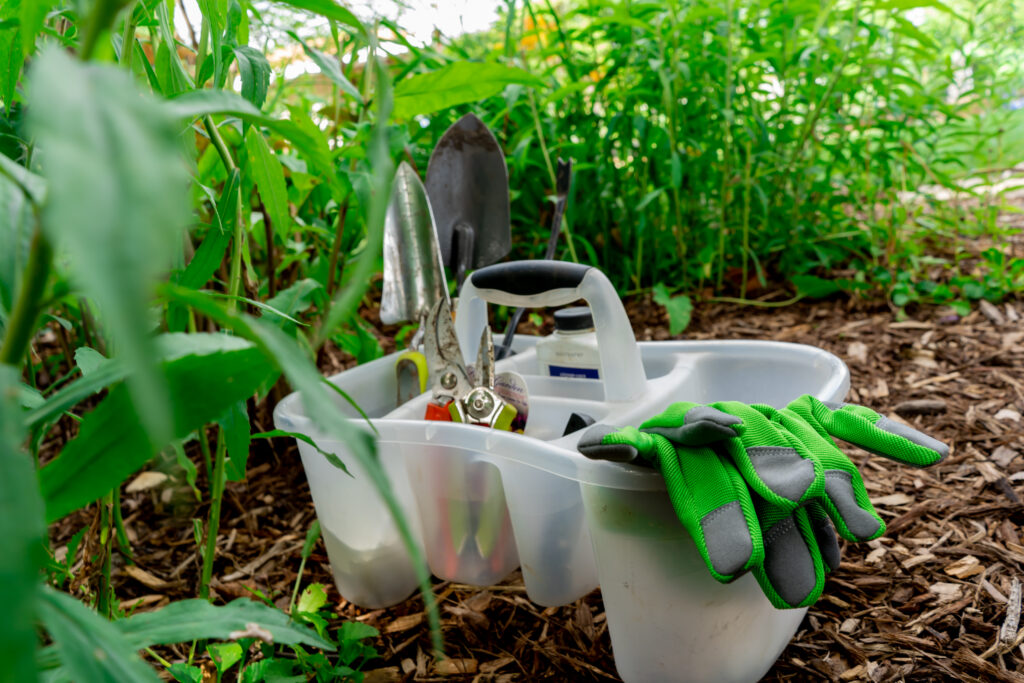
You might wonder why the heck my recommended tool tote is actually a shower caddy. It happens to be one of my favorite cheap tricks. First unveiled in my popular class and book, Cheap Tricks Gardening, the shower caddy turned tool tote never disappoints. I’ve saved many a tool from being lost in the garden by using this handy trick.
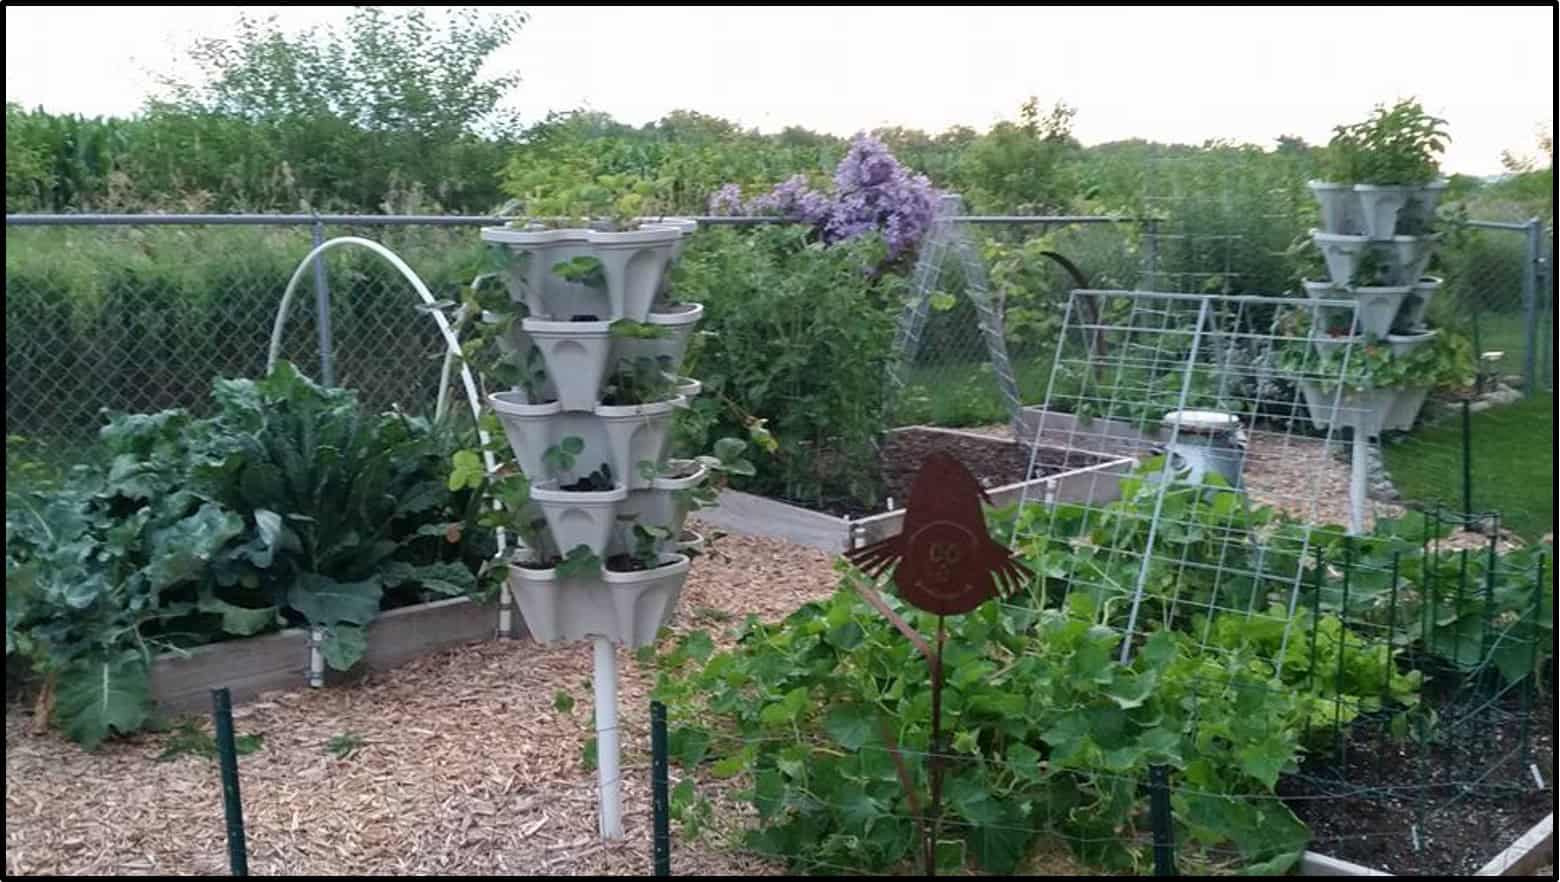
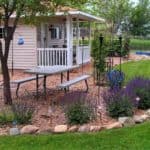
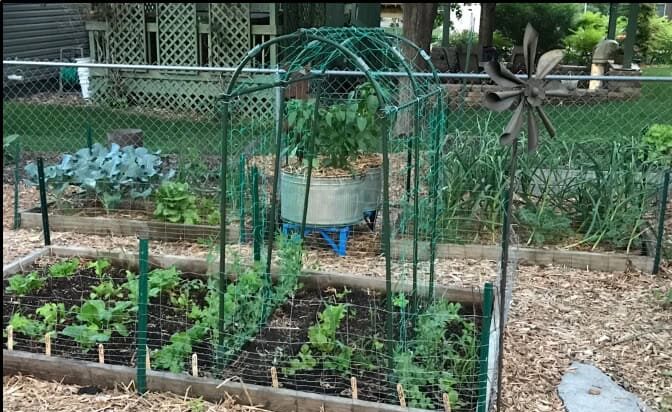
Raised bed gardening
I’m a huge believer in raised bed gardening. In fact, years ago I converted all of my in-ground vegetable gardens to raised beds. Raised beds come in all different shapes, sizes and materials. If you’re into carpentry, you can find many great plans online. If you’re not a do-it-yourselfer, there are also great pre-made kits found at home improvement stores, online and many other locations, especially in the spring.
Advantages of raised beds
- Prevents soil compaction & plant damage
- Extremely productive in a small space
- Earlier and longer growing season
- Less weeding & maintenance
- Better drainage = happy roots
- Control over your soil – conservation & amending
- Perfect for gardeners with disabilities
Recommended sizing
Raised beds come in all kinds of shapes and sizes. Design yours to suit your space, I even have some triangles! I learned the hard way that your bed should not be more than 4 feet wide. Why? This width allows most adults to be able to reach the middle of their bed from both sides preventing stepping into your bed. 6’ X 4’ is a very common size. Have a narrow space? It’s completely ok to go long and skinny, such as 8’ X 3’. As long as you can reach the center on 2 sides, you’re good to go. Your bed sides should be a minimum of 8” tall to allow plant roots to reach deep. Allow a minimum of 3 feet and ideally 4 or more feet between beds for easy maneuvering in your garden.
Material
My choice of raised bed material is pressure-treated (a.k.a green treated) lumber. Today’s pressure treated lumber is safe and much more affordable than other choices like cedar. Certainly, if cedar is within your budget, it is a great long-lasting choice. Be sure to avoid railroad ties which are coated with toxic creosote. You can also build your beds from concrete blocks or even straw bales! Anything that keeps your soil contained and drains freely might become your raised bed vegetable garden.
There is no need to put a floor in your raised bed, in fact, I advise against it for best root development. Place your raised bed in a level area, in full sun, on top of existing soil or lawn. If grass or weeds are present, simply place flattened cardboard boxes, with tape and staples removed, in a single layer completely covering the ground inside your bed. The cardboard will kill the grass and you can place your soil mixture right over the top of the boxes. The cardboard will break down during the first growing season and will not harm your plants.
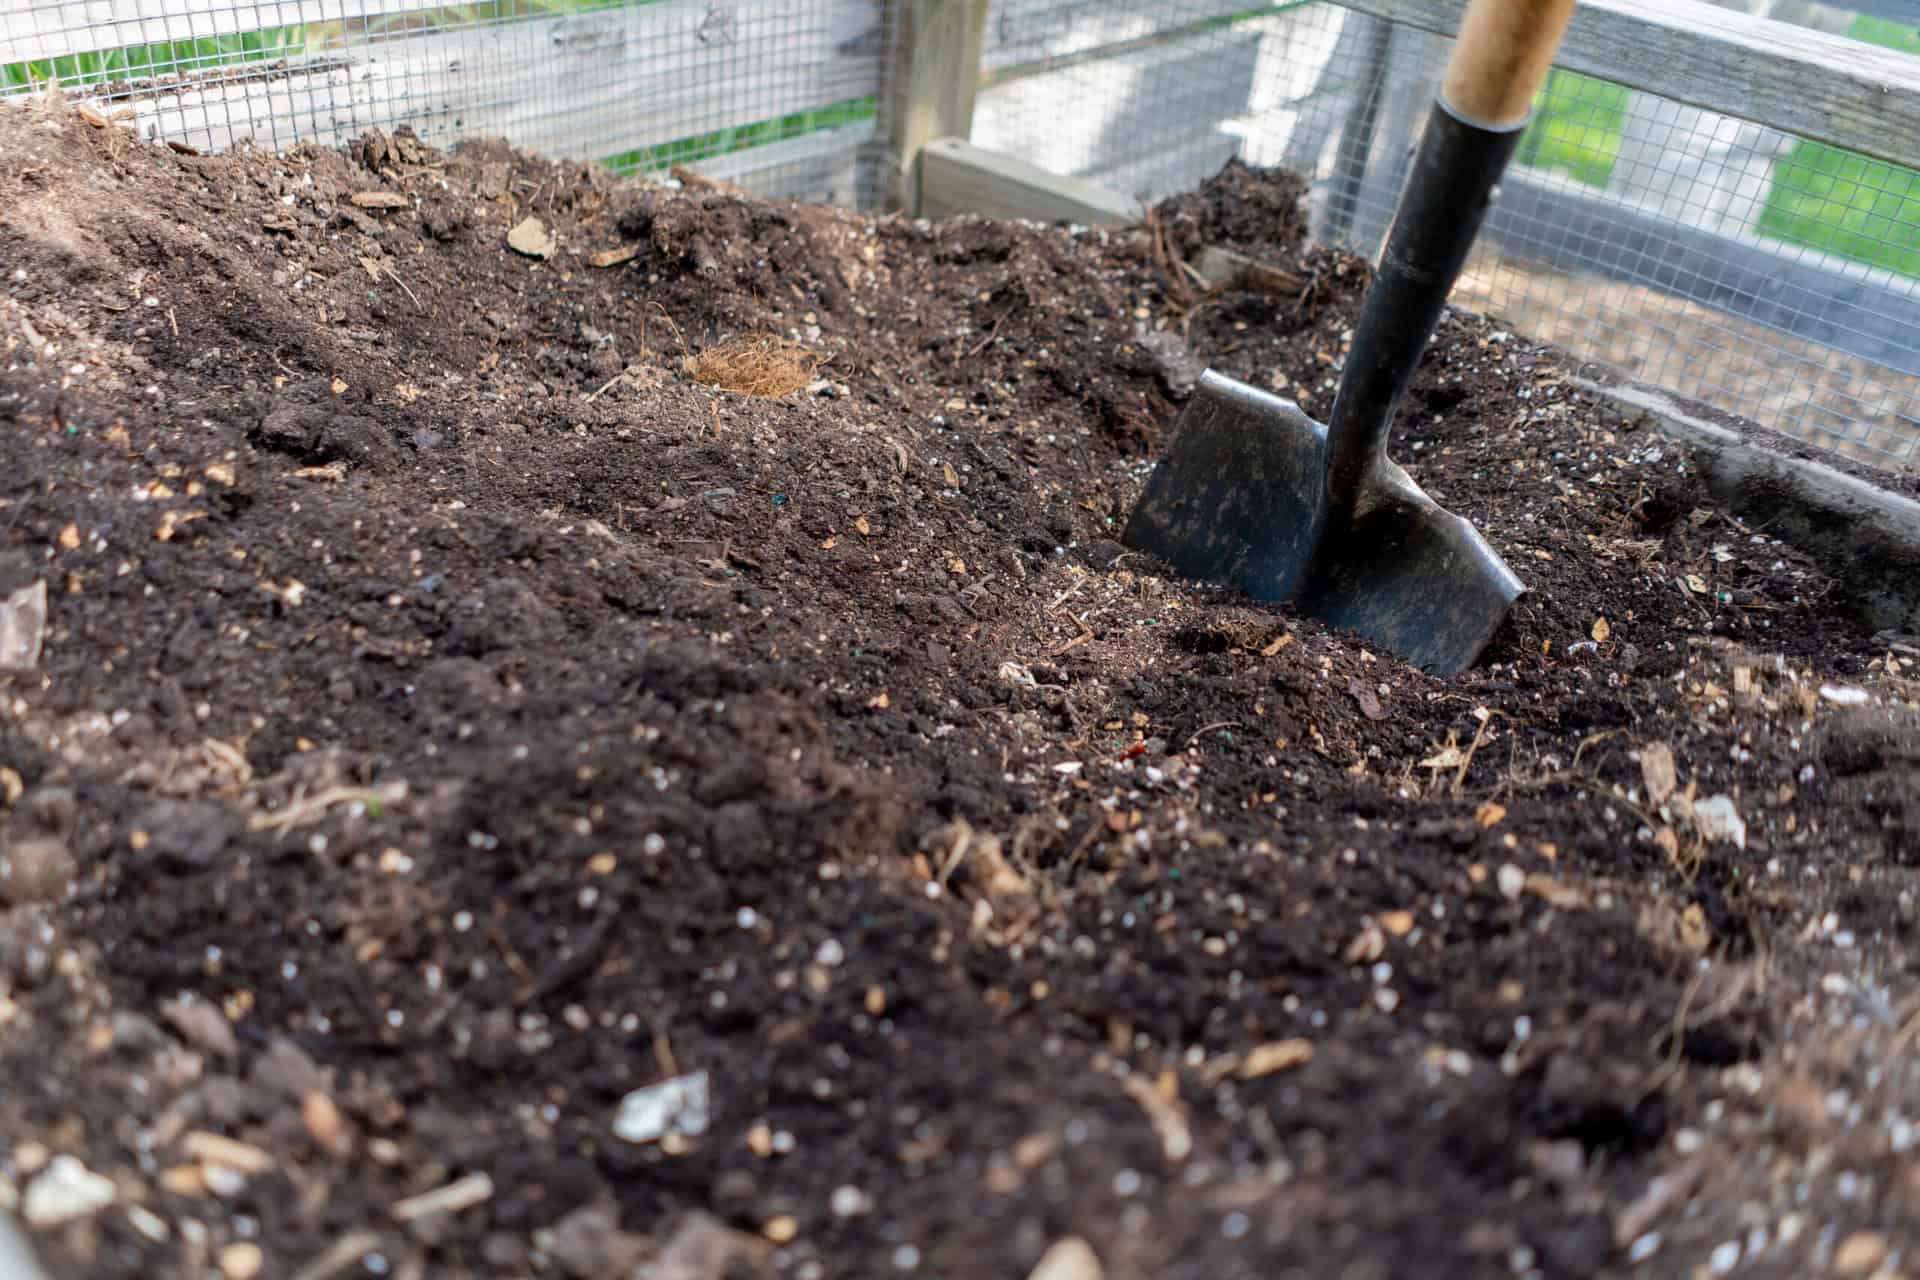
Here’s a really easy recipe for making soil to fill your raised beds.
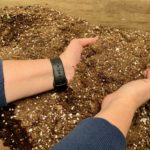
The very best soil for raised beds
2 parts compost
1 part peat moss
1 part vermiculite
Layer into your bed like a lasagna and use a pitchfork to work it in. Your soil should be light and fluffy. Over fill your raised bed as it will settle. Water your newly filled beds well.
Caution: make sure you’re blending your soil on a very calm day. Peat moss and vermiculite are lightweight, making them at risk for blowing away. They aren’t cheap additives if you’d need to replace what the wind whisked away.
Free and fabulous compost is available in many local communities, often created by debris picked up via curbside programs. Check your local government’s website for options. Several also offer an analysis of their compost. Many communities have huge compost piles, created from yard waste and professionally managed and analyzed. These piles are so hot they are literally steaming, killing any seeds and unwelcome contaminates. If you don’t have ready access to low-cost compost, you could lower your quantity of compost and supplement with the cheaper alternative of top soil.
Raised bed soils will need to be replenished a bit each year. To top off your raised beds, simply repeat the recipe above or use the premade garden soil mixes available everywhere that has a nursery or carries gardening supplies. In addition to topping off my raised beds with my favorite soil mix recipe, I also add an organic fertilizer and blend it in to the top several inches of soil.
No room for raised beds? No worries! If you have a sunny spot with 6 to 8 hours of sun, try growing vegetables in pots. Good drainage is always essential for plants so make sure your planter has drainage holes. Always use a good quality potting mix when planting in pots. This mix provides the better drainage that container gardening requires.
#2 Where to plant?
Nearly all vegetables require full sun. Pick a spot in a sunny location where your veggies will enjoy a minimum of 6 to 8 hours of sun daily. Choose a flat area with well-draining soil. Difficult soils can be amended by adding compost, or raise it up with a raised bed for maximum control over your growing medium.
#3 What to plant when?
Grow what you love and what your family will eat. Extras can be shared, frozen or canned. Food banks love fresh produce and appreciate your donations of fresh produce, which is expensive to buy. Your gifts will make a difference and make you feel great too!
It’s helpful to know the difference between “cool season” and “warm season” vegetables.
Cool season
Cool season veggies grow best in cool temperatures. They will tolerate a light frost when temperatures near or reach 32 degrees. Some can even withstand a freeze event when the temperatures fall to 32 degrees or below. It is helpful to know that there is also a “killing freeze” at 28 degrees or below which will kill most non-hardy plants and end the growing season.
In Zone 5, cool season vegetables can be planted as soon as early-April and as late as early-May. Most cool season vegetables are harvested by early summer. Rising temperatures are not the friend of most cool season crops. At this point you can pull your crops that are finished and perhaps even plant a faster growing warm season crop.
Some cool season vegetables mature quickly enough for you to plant again in late summer for a fall harvest. You can also experiment with utilizing row covers, hoop houses and other protective solutions to extend your fall harvest.
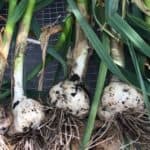
Examples of cool season crops: beet, broccoli, brussels sprouts, chives, cabbage, carrot, cauliflower, celery, chard, garlic (planted in fall), kale, kohlrabi, leek, onion, parsley, pea, potato, radish, scallions, spinach and turnip.
Warm season
Warm season veggies grow best in warm weather. They are not frost tolerant and will be damaged or die if exposed to temperatures below 32 degrees. Some warm season vegetables begin to show strain as soon as temperatures begin to hover in the low 40s and upper 30s.
Warm season vegetables should not be planted outside until the dangers of frost have passed, typically in May for Zone 5. Most warm season veggies are ready to harvest in mid to late summer. Varieties that produce continuously can be harvested right up to the first frost, typically in October for most of Zone 5.
Examples of warm season crops: bean, cucumber, eggplant, melons, okra, pepper, pumpkin, squash, sweet potato, tomato.
Watch your extended forecast to determine your safe planting time and last harvest time. More than once, I’ve been in my gardens with a headlamp on, grabbing up the last of my warm season veggies before the frost gets them. Maybe that should have been listed as an essential tool? More than once each season, I do pull it out for late night (or early morning) gardening. Yes, frosty temps can sneak up on you! Keep a close eye out when we get to late September and into October. If you haven’t realized already, weather is important to a gardener. I have several different weather apps that I check regularly for the forecast, low and high temps, wind speeds and rain totals.
Frosty Forecast Fact
Clear skies and calm winds in fall can send temperatures plummeting. When frost is in question, watering your plants well can help them survive close to freezing temperatures by plumping up their cells with hydration. This will NOT prevent damage to warm season veggies if temps do hit 32 degrees, but it can make your plants more likely to survive temps in the mid to upper 30s. When in doubt, water well and let plants dry for a few hours before you cover with a row cover, old sheets or a hoop house.
The Midwest Garden Gal Zone 5 Grow Guide
Check out my exclusive, FREE, downloadable USDA Zone 5 Grow Guide. Zone 5 sweeps across the middle of the United States. Many areas of Central and Northern Europe also resemble the conditions in Zone 5 of the United States.
Wondering what these zones are all about? The USDA Hardiness Zone map is a means of measuring how cold regions get and applying a zone rating to plants to advise on their likelihood to survive winter weather conditions. This map is the standard by which gardeners and growers can determine which perennial plants are most likely to thrive in a location.
Don’t live in Zone 5? No worries. You should be able to find grow guides specific to your zone via sources like Google, YouTube, Pinterest or use this super cool tool from Farmer’s Almanac. For years, I didn’t really have a guide to follow. I used my fundamental knowledge of cool and warm season crops and looked up my average frost date and worked from there. A quick google search will reveal this information specific to your area.
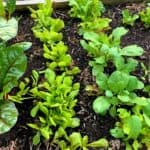
Easy grows for quick success
These crops are fairly easy to grow and a great place to begin.
From seed (direct sown outside)
- beans, beet, carrot, cucumber, kale, lettuce, pea, radish, spinach, squash, turnip
From transplant (the plants you buy in the nursery)
- broccoli, chard, herbs, onion, peppers, tomato
Before you dive in to tomatoes, prep yourself by reviewing my 12 Best Tips for awesome tomatoes.
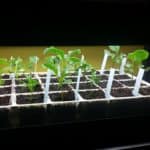
Tips for growing from seed (sown outdoors)
- Read the packet and believe it – the seed packet has tons of great information including description of the plant, common and scientific names, plant height at maturity, days to germinate, days to harvest or bloom and habit (i.e. climbing, upright and more).
- Do NOT store your seeds in a shed, garage or place where mice can infiltrate.
- Hardware organizers have drawers that are the perfect size to store and organize seeds, stored indoors.
- The expiration dates are bogus. Seeds kept dry and out of sunlight last 3 to 5 years.
- Well prepared loose soil is essential – see my very best soil for raised beds above. For pots, use a good quality potting mix.
Special mention about squash
So easy to grow if you know the secret that took me years to figure out. In Zone 5, sow your seeds AFTER June 1 (later if late/cold spring). Oustside of Zone 5? Adjust your date for your particular Zone. Squash, pumpkins and gourds are highly susceptible to squash borer which will turn plants from gorgeous to dead in a single day. The squash borer moth lays eggs on these plants. The larvae emerge as a borer and eat their way into the plants, killing them. By delaying planting until June 1 or later, the moth has finished it’s life cycle and died. Always plant these crops from seed as the squash borer moth also loves to visit nurseries where there is a ready supply of plants to lay eggs on. Squash grows very quickly so you can still get an excellent harvest and avoid the devastating impacts of a squash borer infestation.
#4 Caring for your crop
Fertilize
The compost in the compost, peat, vermiculite blend you’ll fill your beds with provides amazing nutrients for your crops. As I replenish my beds each year, I like to add an organic fertilizer in the spring when I’m prepping the beds.
Water consistently
For all remaining veggies, annuals and any first-year plantings, maintain a consistent watering schedule right up until frost. Most annual vegetable plants thrive best with 1 inch of water weekly. If we don’t get that through rain, we need to supplement. Perennials are quite hardy once established. After the first year, they should seldom need extra water unless we have an especially hot and dry period. Annual flowers and vegetables in addition to any plants in pots need consistent water for success. Watch the forecast and plan accordingly.
Mulch your garden
Much like mulch can benefit your other garden spaces, mulch is an essential element in our vegetable gardens. A three to four-inch layer of mulch has many benefits including weed control, water preservation, soil insulation from extreme temperatures and protection from soil-borne diseases like blight. When you apply your mulch around your plants, be sure to keep mulch one inch away from the stems. If you are seeding, wait until your seeds sprout to put down your mulch. Newly seeded areas will ideally be the only exposed parts of your garden.
While I usually use wood chips everywhere else, I prefer straw in the vegetable garden. Straw is an agricultural by-product of the dry stalks of cereal plants after the main crop is harvested. It can be wheat, oats, rye, barley or buckwheat. Be careful when sourcing your straw as it can contain a lot of weed seeds. I obtain my mulch from a local nursery. A reputable source is much less likely to have lots of seeds. Your straw may have some residual seeds from the main crop that will come up looking like grass. They pull out easily if that occurs. Other choices for mulch in your vegetable garden include leaves, pine needles and untreated grass clippings.
Always weeding
The weeds can sneak up on us fast. They rob our gardens of beauty and steal nutrients from the plants we’ve added. Additionally, many weeds will produce thousands more if allowed to go to seed. Weed continuously. A morning or evening habit of walking around your garden with a basket to gather weeds as you go makes the task a little more enjoyable. Visiting the garden after a rain can be very rewarding as you pull your unwanted visitors out easily. Consistent weeding until season-end will keep your garden looking nice and keep weeds from getting out of control come spring.
#5 Friends & Foes
When getting familiar with your garden, it is important to know that you are not alone. Various friends and foes will be visiting your garden. For better or worse, they are part of the wonderful diversity that is your garden. Let’s get to know a few of them.
Friends
- Bees – the humble bumble bee and the more than 4,000 of the other bees native to North America are visiting our gardens. And we are so glad they are! Their role is impossible to over emphasize – in short, no bees = no food. The vast majority of our fruits and vegetables are pollinated by bees. Indirectly, bees also pollinate crops like alfalfa that feeds animals we eat, such as cattle. Bees will be happily buzzing around in your garden, pollinating your crop, thereby creating the produce you will enjoy. Do not fear a sting. Of course, if you are allergic to bee stings, take proper precautions. Bees are fairly docile and not interested in you, unless they or their nests are harmed. I’ve worked in my gardens right next to bees for decades without a single incident. The only sting I’ve ever received was, as a child, when I was running through a sprinkler and accidentally stepped on a bee dining on clover in the grass. Really, can you blame the poor bee for that?
- Toads – a sure sign of a healthy garden is the presence of toads. These funky little friends are fun to watch for sure, but did you know they are working hard in your garden? They eat lots of insects, including mosquitos, slugs and snails. Encourage them in your yard and garden, by providing places for them to hide in cool shady spots, moisture and lots of garden plants.
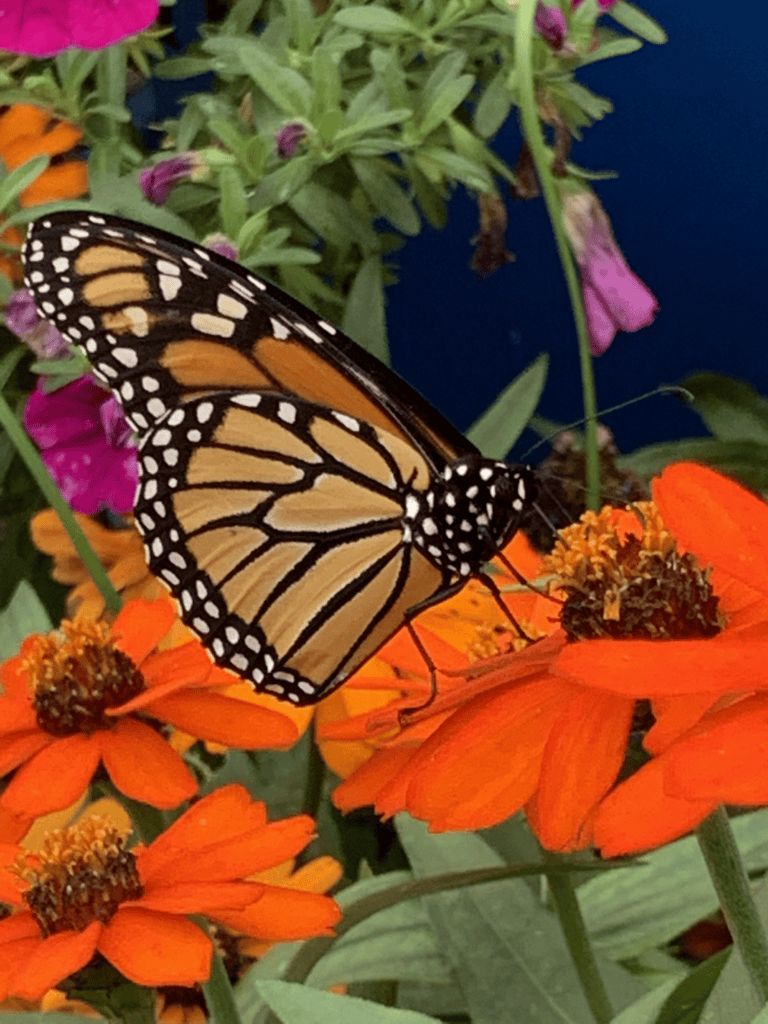
- Butterflies – like bees, butterflies pollinate our plants when they feed from the flowers. They, and their young caterpillars, are also an important source of food for many birds, small animals and invertebrates. Of course for many of us, much of the benefit of butterflies is enjoying their graceful presence in the garden as they flit from flower to flower.
For all of these friends, welcome them and help them thrive by avoiding ALL insecticides and pesticides and minimizing the use of chemicals in your garden. Also, while in the garden watering, be sure to spray a little extra in shallow areas in your garden or on the patio to provide a drink for our friends. I love to provide shallow trays of water with rocks or glass beads in them for our friends to rest on while grabbing a sip of water. You might call it a “bee bath”.
Foes
- Rabbits – I know they are cute, but you might think differently when they devour your garden. Make sure any new garden plan includes the immediate addition of a bunny fence BEFORE planting. Be sure that your fence is dug in at least an inch underground and secured on all sides with quality earth staples if in ground. They can and will dig and jump. Even better, secure your bunny fence right to your raised bed, rising up from the bed on all sides. The standard rabbit fence securely installed on fence T posts and pinned to the ground well should deter these destructive critters. In short, you MUST have a rabbit fence for any vegetable garden. Do not make the mistake a friend recently made. Having constructed some new tall raised beds, she left her extra building materials lying stacked up beside the bed. You see where this is going right? Indeed, the next morning she went out to check her new plantings and, to her horror, discovered that the bunnies had found the handy “ladder” she’d left for them and spent the night devouring her newly planted garden. They are VERY resourceful.
- Deer – a hungry deer can devour your garden, shrubs and trees in a single evening. You know they travel in a herd right? They will happily bring their friends to visit your buffet. Truly the best deterrent for deer is a seven foot tall or higher fence all the way around your garden. If that’s a little much for you to manage, I’ve had good look deterring both deer and rabbits with PlantSkydd, a natural blood product. It stinks a lot when first applied. Once it dries, we can’t smell it, but the animals can and they think there is a predator around, causing them to move on. Best of all, it seems to last through a few rain showers which is not the case for most deterrent products.
- Japanese beetles – ugh these pesky bugs can be so destructive. When they invade they get busy munching on our beloved plants. Favorites of these beetles include linden trees, beans, roses, crab apple trees, grape vines, hibiscus, raspberry bushes, and Japanese maples. Instead of dumping harmful insecticides in the garden, I like to use this low cost, low effort method of hot soapy water in a bucket. At dusk, these nasty critters take a nap on your plants to rest up for an early morning of new munching. Shortly before dark, add a few inches of hot water to any container. I love a repurposed ice cream bucket with handle for this purpose. Add a few drops of dish soap to your bucket of hot water and suds it up a little with your hand. Then, head to the garden and gently brush your now docile beetles into the bucket. The dish soap helps ensure these pests head straight to the bottom of the bucket and drown. This method is effective and strangely satisfying. Most importantly, it is insecticide free so it doesn’t harm our garden friends or ourselves.
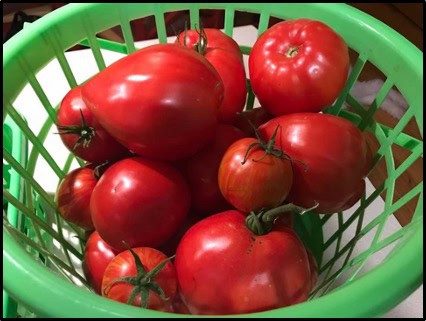
#6 Harvest
It’s harvest time and you’re ready to collect the rewards of your hard work. This is a wonderful time of discovery and surprise as your plantings, made many weeks and sometimes many months ago, achieve their ultimate objective. Over the years, I’ve collected a few cheap tricks to maximize harvest with foolproof methods that you can use year after year.
Now that we’re in high season for early summer-planted veggies, you’ll want to be checking daily for new garden gifts ready to enjoy. Keep on harvesting, freezing and canning through fall to maximize the rewards of your hard work! The more we harvest, the more our plants will be incentivized to add new growth.
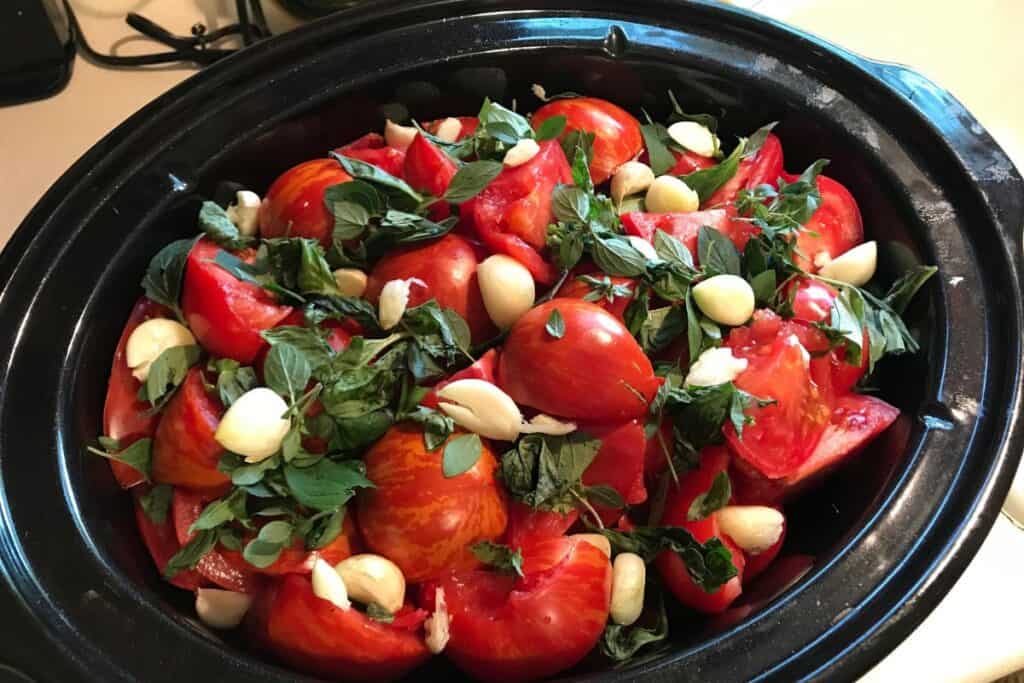
Before we dive into how to extend your produce enjoyment for many months to come, let’s not forget to enjoy delicious in-season dishes throughout the growing season. As I write this, I can feel the crunch of that sugar snap pea. I can taste that first vine-ripened tomato. Plan your meals around what’s ripe and ready in your garden and you’ll truly realize the blessing that is your very own produce garden. Enjoy these easy recipes that I turn to again and again.
Preserving your bounty
Freezing, drying and canning are all popular methods for preserving your garden haul. For every preservation technique, it is essential to label and date your product. Using a vacuum sealer, although not necessary, can extend your preservation time even further by removing all of the air that can hasten spoiling. Instead of a vacuum sealer, you can use regular freezer bags, squeeze out as much air as possible, zip across most of the way, insert a soda straw, squeeze out remaining air, remove straw and zip closed.
Since preserved fruits and vegetables, although delicious, won’t retain their crisp from-the-garden texture, preserving is primarily for use in cooked dishes throughout the cold season months.
My favorite preservation process, by far, is freezing. It’s relatively easy and many garden-grown foods tolerate freezing well.
Here are some easy fruits and veggies to freeze that require little preparation. For all of these, remove bad spots, wash and let dry.
- Berries – freeze small berries (like blueberries, raspberries or blackberries) whole. For large strawberries, core and cut in half before freezing.
- Cabbage – freeze leaves whole for cooking only. If you love cabbage rolls, you’ll find freezing and thawing them will make the leaves much easier to work with.
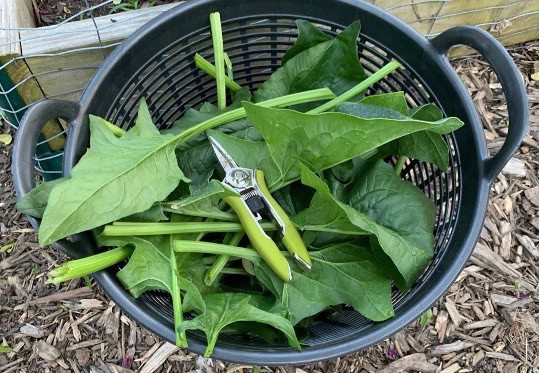
- Kale – remove stems, blanch in boiling water for 3 minutes and then immediately plung into ice water to stop the cooking process. Freeze leaves whole, break frozen pieces off for adding to soups and stews.
- Onion – chop and freeze. Since onion is in so many recipes, you may want to measure the exact amount for your favorite recipes to save prep time later.
- Pepper – any pepper, hot or sweet, will freeze well. Freeze whole or chopped.
- Spinach – freeze and use within two months.
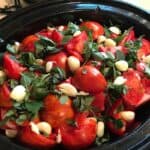
- Tomato – core and freeze whole. You don’t need to blanch and remove the skins; when you thaw them, the skins will easily slide off.
To avoid a solid block of fruit or veggie ice, you can freeze any of these separately on a cookie sheet lined with parchment paper before adding them to your freezer bag. This method is called “flash freezing” and it’s a great technique for many of your garden favorites.
Other vegetables, like mentioned abobe for kale, may require blanching, a process of quick boiling and plunging into ice water to stop cooking. An online search can provide specific preservation instructions for your particular fruit or vegetable.
Herbs
Some herbs freeze well with little to no prep. These include basil, borage, chives, dill, lemongrass, oregano, sage, savory, sorrel, sweet woodruff and thyme. For all of these, follow the wash-and-dry directions previously described, along with flash freezing.
Most herbs also dry well. You can hang them to dry or place in a paper bag, but I like to take the express route by microwaving those clean, fresh, air-dried herbs. For quick drying, place the herbs on a paper towel and microwave on high in 30-second spurts. Watch your herbs closely while they microwave as they can burn easily. Once dry and crispy, let them cool completely, then bag in zipper food-storage bags.
Here’s another favorite cheap trick: Use empty pill bottles to store dried herbs. Remove the existing label, wash and dry the bottle thoroughly. Date and label your pill bottle. I like to use a label maker so I can keep using my bottle for years to come. Pack the bottle full of your dried herb and replace the cap. Dried herbs typically last 1 to 3 years. They don’t really spoil in their dried state, but will lose flavor after a few years. When their flavor has faded, it’s time to toss them.
Check out the endless options found online, such as making herb ice cubes, pesto, marinades and flavored oils to enhance your culinary contributions.
Time to head out to the garden
Embrace these tips and get started in your garden! You’ll be amazed at the things you can accomplish. Vegetables can be fickle and impacted by weather conditions that vary each year. If you have a rough year, or even a failed crop…don’t sweat it. As I often say, there’s always next year! Dive in and grow those green thumb skills.
SHARE IT ON PINTEREST